Mac Reatart and Try Signing in Again
When you are using a Mac system, you might come up across the "Your reckoner was restarted because of a problem" error bulletin. This tin can happen once again and once again which turns out to be really frustrating. This is basically known as Kernel Panic on Mac. Normally, a reckoner tin restart due to multiple reasons depending on unlike scenarios. In some cases, you initiate a restart which would exist normal behavior or a software install can crave a reboot before you are able to utilise it. Both of these are common and completely normal scenarios. Yet, what is not normal is when your Mac restarts without any reason at all, or at to the lowest degree a reason that is known to you. When the system boots up again or, you will be shown the error message.

As it turns out, the reason that y'all are facing the error message is due to kernel panic occurring on your system. Now, even though the name sounds scary, kernel panic is basically a Mac version of the infamous Windows blue screen of death errors like the Memory_management mistake. This essentially happens when your macOS encounters a trouble that information technology cannot handle due to which the computer is forced to restart automatically. If this happens rarely, then it is non much of a problem. Even so, when it starts happening on a regular ground is when it is to be taken seriously.
Now, in that location are multiple reasons why y'all might face a kernel panic. As it turns out, a kernel panic tin can exist caused by bug with your arrangement files. This means that if your system files are damaged or corrupted, you will be seeing a lot of kernel panics. In addition to this, there are other factors that can also contribute to the issue in question. And then, before we get into showing you the different means of solving the problem, permit us kickoff discuss why this really occurs so that we tin can isolate the source of the problem. With that said, let united states of america leap into it.
- External Peripherals — The beginning reason that y'all might exist encountering a kernel panic could exist due to the external peripherals that are connected to your Mac. In such a scenario, you will accept to merely disconnect all of the connected peripherals from your Mac and so see if the problem is even so in that location.
- Outdated MacOS — Another reason for your system restarting again and again could be an outdated macOS running on your organisation. This particularly happens when you are using the latest apps on an older macOS version which tin can often cause compatibility issues. In such a case, you will have to update your macOS and make sure that you are running the latest version available to yous.
- Corrupted Arrangement Files — Every bit it turns out, corrupted system files can as well cause your system to restart again and again automatically. Information technology is pretty obvious that when your system files are damaged, you are jump to come up beyond various issues while using your macOS machine. In such a case, you will have to simply repair your disk via the Disk Utility app.
- Third-Party Software — All of usa use third-party applications on our systems. In some cases, a 3rd-party software can cause an upshot due to which your Mac is forced to restart. If this example is applicable, you will have to go rid of the software that you have recently installed to resolve the upshot.
- Display Scaling — Finally, as it turns out, the problem could likewise exist due to the brandish scaling settings of your Mac in some cases. This especially happens when you are using a custom brandish scaling instead of default. In such a scenario, you will have to revert to the default setting to resolve the problem.
Now that we accept gone through the potential causes of the problem in question, we tin get into showing you the various ways of fixing the mistake message mentioned without any bug. With that said, let us go started without any further delay.
Change Display Scaling (if applicable)
As information technology turns out, the first matter that you lot should exercise when y'all are facing the mentioned error message continuously is to make sure that you are running the default display scaling on your Mac. MacOS lets you have a custom brandish scaling should you choose to. However, in some rare cases, this can crusade an outcome with your Mac which is why it is restarting automatically. This can be easily changed via the System Preferences. To do this, follow the instructions given down below:
- Starting time of all, on your Mac, click the Apple icon and then from the drop-downward carte, cull Organization Preferences.

Opening System Preferences - In one case the system preferences window is open up, click on the Display option.

System Preferences Window - There, on the Display tab, choose the Default for brandish option. If it was already on the default option, you will have to scale information technology per your display's resolution.

Resetting Display Settings to Defaults - To do this, press the Selection cardinal on your keyboard and then click the Scaled option. This volition bring up a drop-down carte from where you can choose your display resolution.

Choosing Custom Display Resolution - Once yous have done, keep using your Mac to see if the problem persists.
Remove External Peripherals
As we have mentioned above, i of the reasons that you are encountering the fault bulletin in question could be due to the peripherals that are connected to your Mac. This includes any hard drives, printers and more. In order to do this, yous will have to first plough off your Mac then remove the devices from your automobile. In case yous are using a desktop Mac, you don't demand to remove your keyboard, mouse and the display. Later on doing that, go ahead and open your Mac and use it for a while to see if the trouble occurs again.

In case the problem doesn't appear, you tin can turn off your Mac again and endeavour to connect the devices that y'all removed earlier i at a time. This will help you in figuring out what device is actually causing the problem to occur. In instance the issue is however in that location, movement on to the adjacent solution downwards below.
Update MacOS
Running an outdated version of whatever awarding is never actually recommended and particularly when it comes downward to your operating arrangement. System updates are really important for your device every bit they contain security patches and plenty of bug fixes. In addition to that, if you are running newer applications on an outdated version of macOS, there are chances that it can cause some compatibility issues. In such a scenario, you will have to brand sure that your macOS is up to date. To do this, follow the instructions given down below:
- First of all, y'all will have to open up up the System Preferences window. To practice this, click on the Apple icon in the top left corner and then choose Organisation Preferences from the drop-down menu.
Opening System Preferences - One time the Organization Preferences window is open up, click on the Software Update option.
Organisation Preferences Window - In that location, Mac volition automatically search for any updates available. If updates are institute, you will exist able to run into a Update At present push.
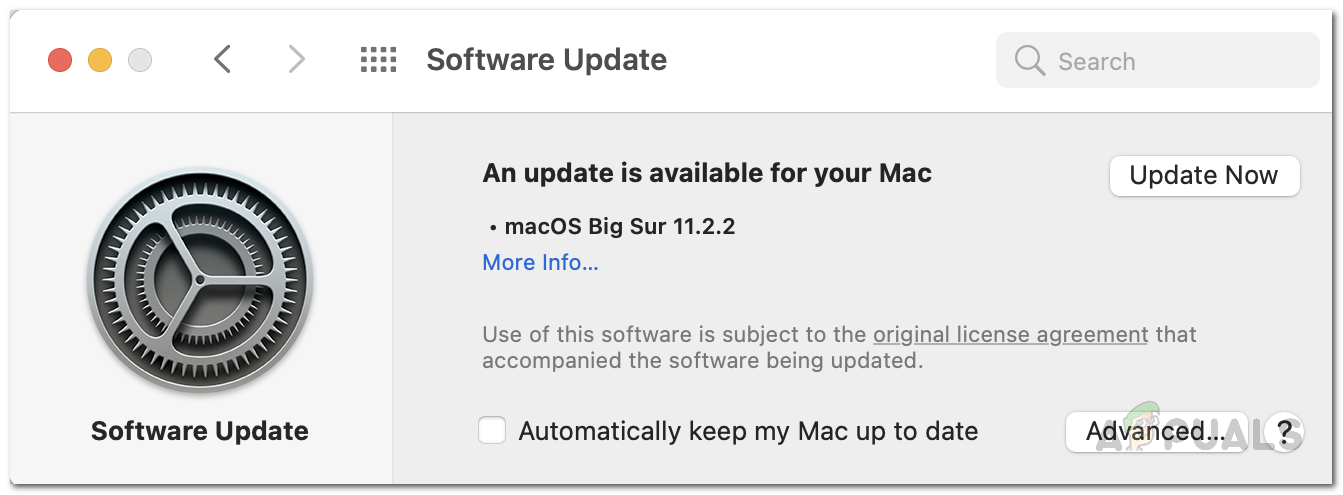
Updating MacOS - In example you don't find whatsoever updates, click on the Advanced button at the bottom right corner.
- There, make sure everything is ticked and so click the OK button.

Software Update Avant-garde Options - Look for the updates to be installed and it may fifty-fifty require you to restart your PC.
- Once y'all are washed with that, employ your Mac to see if the trouble is still at that place.
Reset NVRAM
Every bit it turns out, NVRAM or Not-volatile Random Access Memory is basically a small amount of memory on your Mac that is used to store specific settings for the purpose of accessing them speedily afterward on. The different settings that are oftentimes stored in NVRAM are display resolution, startup disk selection, kernel panic information and much more. Resetting NVRAM tin can aid set several issues on your Mac, peculiarly a kernel panic. To reset NVRAM on your Mac, follow the instructions that are given down below:
- First of all, make certain that your Mac is powered off.
- Then, become ahead and power it on and immediately press the Pick + Control + P + R keys on your

Pressing Control + Option + P + R to Reset NVRAM keyboard. Hold downwardly the keys for around 20 seconds and and then release them.
- If your Mac plays a startup sound, you can release the keys afterwards the second startup sound.
- In case y'all have a Mac that is running the Apple T2 Security Fleck, you lot will have to release the keys later y'all run across the Apple logo disappear for the second time on your screen.
- So, one time you have done that and your Mac boots up, use it and see if the problem occurs again.
Uninstall Recently Installed Software
Third-party software is used by every 1 of us for the sake of our mean solar day to twenty-four hour period tasks. In some scenarios, if you are running an outdated software, it can cause some issues with your Mac machine that might forcefulness information technology to restart automatically. This can often be due to compatibility issues. In such a scenario, you will have to update the apps on your arrangement to come across if that fixes the problem.
In case all the applications are running on the latest version available, and so it is possible that an application is malfunctioning and causing a kernel panic. If this case is applicable, you will have to uninstall the 3rd-party software that you have installed prior to the appearance of the fault message and and so encounter if the problem is solved. Follow the instructions given down below to uninstall an app on a Mac:
- To uninstall an app from Mac, simply go ahead and open the Applications directory in Finder. Alternatively, you can click on the Go drib-downwards menu on the top bar and then choose Applications from there.
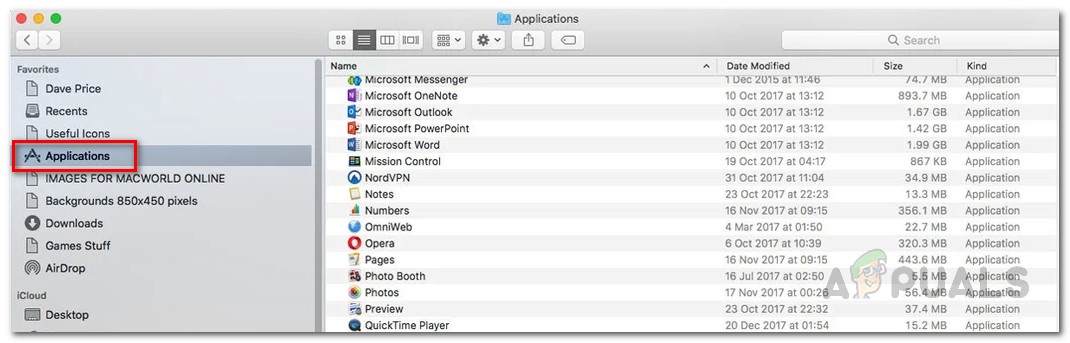
Going to the Applications directory in Finder - There, CTRL + Click the application and so from the drop-down menu, choose the Move to Trash selection.
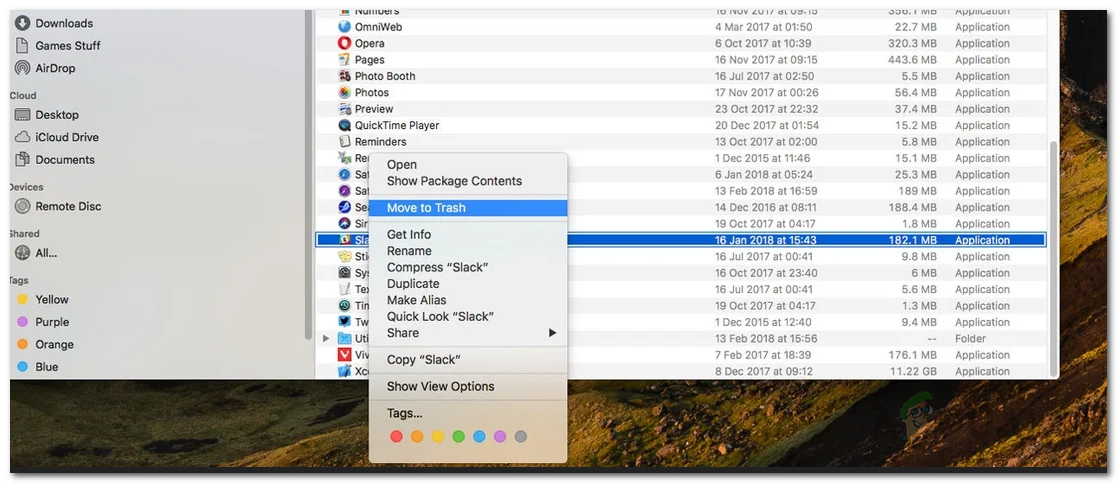
Removing Application on Mac - See if that fixes the problem.
Repair Deejay Errors and Permissions
In case the trouble is yet there, and then it is probable that your deejay is either damaged or the permissions are incorrect. This is never a good sign because information technology can include damaged system files which can cause several critical problems on your device. However, luckily, there is an easy way to repair your system files on your Mac. This can be done via the Disk Utility that comes on your macOS for the very same reason. Disk Utility tin be used for a lot of reasons simply one of the major features is that it allows you to scan your disk for any errors and then repair them via the First Aid utility. To do this, follow the instructions given down below:
- Outset of all, click on the Apple tree logo at the acme left corner and so cull Restart from the drop-down card.

Restarting Mac - As your Mac restarts, immediately hold downwardly the Command + R keys on your keyboard until you encounter the Apple tree logo on the screen.

Pressing Command + R - This will eventually have you to the macOS Utilities window.
- There, from the list, choose Disk Utility and and then click the Keep button.

Opening Deejay Utility from macOS Utilities - One time the Disk Utility window is upwardly, select your difficult drive on the left-hand side and then click the Get-go Aid option at the top of the window.

Running Showtime Help - Click the Run push on the pop up that appears.
- Expect for the repair to complete. Once it has finished, you can restart your system and login to your business relationship.
- And so, use your Mac for a while and run across if the problem still appears.
Reinstall MacOS
If your trouble hasn't gone away after trying all of the solutions mentioned to a higher place, then you will have to completely wipe out everything on your device and perform a reinstall. In such a scenario, we recommend to outset create a fill-in of all the important files on your Mac before performing a reinstall. MacOS can be easily reinstalled via the macOS Utilities window that we used above to repair the hard drive. To reinstall MacOS on your computer, follow the instructions given down below:
- First of all, y'all will have to start up your Mac in recovery mode.
- To practice this on a Mac with Apple silicon, go ahead and power off your device start. Then, press and concur downwardly the power push until you lot run across the Loading startup options bulletin on the screen.

Mac Power Button - So, click on the Options icon and click Continue.
- If you are on an Intel-based Mac, the procedure is a flake different. First of all, go ahead and restart your Mac.
Restarting Mac - Equally your device restarts, rapidly concur one of the 2 combinations mentioned below depending on what you want to exercise.
- Press and concord the Option + Control + R keys if y'all wish to install the latest version of macOS on your computer.

Pressing Pick + Control + R - Or, press and hold the Shift + Option + Control + R keys if you wish to reinstall your computer's original version of macOS on your computer.

Pressing Shift + Option + Command + R - Once you have washed that, the procedure is the same from here onwards.
- On the Recovery app window, go ahead and select the Reinstall macOS or Install macOS option so click the Go along button.
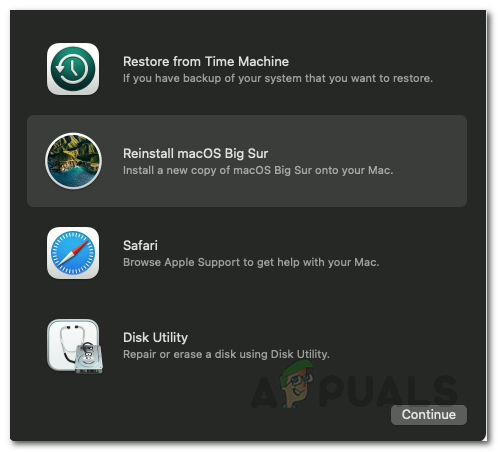
Choosing Reinstall MacOS Option - Later that, follow the on-screen prompts to consummate the installation configuration. Once your macOS has reinstalled, employ it for a while to brand sure that the fault message is no longer in that location.
![]()
Source: https://appuals.com/your-computer-was-restarted-because-of-a-problem-mac/
0 Response to "Mac Reatart and Try Signing in Again"
Post a Comment